
Isn’t this a beautiful candle holder? I love the effects the candle light gives off through the pattern. I thought it would make a lovely feature on our dinner table at the ceremony in France, and then I could dispose of them afterward so my luggage load could be lightened on the return trip home. They are made from aluminum cans, after all.
I found the tutorial and pattern for these candle holders from here.
I spent a few months collecting tin cans from all my store bought tomato sauces and canned soups. I found the cans with the self-opening lids (those that didn’t require a can opener) were the best to save because the edges were less rough. This is an important feature when you’re dropping in candles in the can. Don’t wanna scratch up those pretty hands!
I followed the instructions as indicated, using regular old nails I had in my toolbox. I quickly found that the tins bent inward with each hole punch. And the can rolled around a lot. I searched online for alternative solutions. I tried filling the cans with ice, but when the condensation hit the can, the moisture leaked through to the paper pattern and the paper started to disintegrate. It was a mess. PLUS! Holding onto the nail for each hole is really rough on the fingers. It was a painful process.
In the end, I saved about 20 cans and only made five candle holders. Five was all my little fingers could take. I used ten for my get-away bunting, so all that collecting wasn’t for nothing after all. Phew!
If you intend to take on this project on your own, here’s what to expect:
- Your fingers will hurt.
- Use larger nails as punching larger holes will give off better light.
- You have to hit the nail hard to puncture the aluminum. Don’t be gentle with it. And don’t hammer your fingers.
- The nail will want to slide around a bit (especially if you’re hammering directly onto the aluminum), so it’s best to have a steady hand.
- Filling the cans with ice will eventually shred the paper pattern.
- If you fill the cans with nothing, then the cans will bend out of shape.
- Have patience! LOTS of patience.
- I’m not joking.
In the end, once the candles are inserted and lit, you can’t even tell the tins were all bent out of shape. Maybe I will give this project a try again… someday far, far, far away.
If you had better success and can offer any tips, I’d love to hear them!
Total Time: Each can averaged about an hour. I think.
Total Cost: Totally free as I recycled tin cans from food we ate.
If you missed any part of the Project Wedding series, you can view them here:
How It All Began
The Ceremony
Pom Poms and Fans
Tin Punched Candle Holders
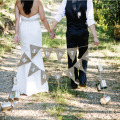
No Sew “Just Married” Bunting
The Dress
DIY Hair Fascinator
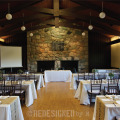
The Reception
Creating The Invitations
DIY Ticket Booth
Passport Guest Book
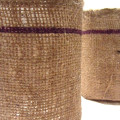
Stenciled Burlap Table Runners
Our Wedding Cake Alternative
Traveling Trunk Prop
DIY Photo Booth Props
Out of Town Gift Boxes
Organize Your Wedding Mementos
Tips For Planning Your Engagement Photo Shoots

I loved these candle holders, they really create a nice lighting effect!
You didn’t think they looked crappy when unlit? Lighting them really brought out its true beauty, I thought!
*their true beauty