What’s a travel themed wedding without a passport? This was the concept for our guest book and it turned out beautifully! Best of all was that it cost us absolutely nothing as we used paper from my stationery supply. Again, the most time consuming part was designing the pages. As Mr. M is Canadian and I’m American, I used both our passports as inspiration for our guest book design. Admittedly, the US passport is much more interesting as the new update has images of USA and inspirational patriotic quotes. These elements inspired me to use images of Mr. M and I in various locations we’ve visited (e.g. Japan, London, Korea) as well as the passport stamps corresponding to those locations. The patriotic quotes were replaced with famous travel quotes.

After that was done and printed, it was time to bind the book. Here’s how I did it:
What you’ll need:
Corner round puncher
Binder clips
Thumb tack
Needle
Thread (in color of your choice)
Adhesive (spray, stick or liquid - whichever you’re most comfortable with)
Card stock (for cover)

Step 1. Before you do any binding, put your pages together and round off the corners with a corner round puncher. This can be easily found at Michaels. Then keep the pages together by clipping them with binder clips. You do not want your pages sliding around when you start to bind.
Step 2. Pierce the pages at the center fold with a thumb tack. This will make it easier for the needle to thread through.

Step 3. Hand sew the pages together with a needle and thread.
Step 4. Sew the pages in the opposite direction to finish off the binding. You now have bound pages!
Step 5. (Image not available) Lastly, glue your first and last pages to the cover of the passport. (I used a glue stick.) As the US passport cover is really stiff, I used the cardboard from a FedEx envelope.

Finish off the guest table with a small globe (picked this up from Marshalls), a suitcase as a card box (from HomeSense), and the “Just Married” bunting from our ceremony in France.
Total time: As this wasn’t done in one continuous sitting, I am guessing it took a total of a week to design, mock up, print, bind, and admire at my handy graphic work. I still am in disbelief that I pulled this together. (And all on Word, for those of you who don’t have Photoshop or Illustrator.)
Total cost: Zero! Zilch! Nada!
If you missed any part of the Project Wedding series, you can view them here:
How It All Began
The Ceremony
Pom Poms and Fans
Tin Punched Candle Holders
No Sew “Just Married” Bunting
The Dress
DIY Hair Fascinator
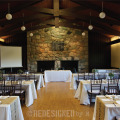
The Reception
Creating The Invitations
DIY Ticket Booth
Passport Guest Book
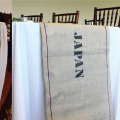
Stenciled Burlap Table Runners
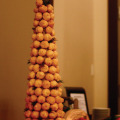
Our Wedding Cake Alternative
Traveling Trunk Prop
DIY Photo Booth Props
Out of Town Gift Boxes
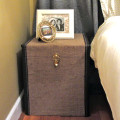
Organize Your Wedding Mementos
Tips For Planning Your Engagement Photo Shoots
Wow, this is so so beautiful !!
What a kind thing to say! Thank you!! ~M.