
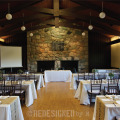
Instead of using the traditional table numbers, we gave our tables names of places Mr. M and I traveled to together, further emphasizing the travel theme. Since I don’t like dining surfaces to be too cluttered, we stenciled the names of the tables on the runners. I thought the resulting effect was perfect! These runners were no sew - seriously! Here’s how I did it…
Supply List
Burlap
Drapery weights
Scissors
Hot glue gun and hot glue sticks
Painter’s tape
Newspaper
Colored paint (I used purple as that’s my color scheme)
Sponge brush
Letter stencils
Black or charcoal paint
Step 1
Make the runners. First, cut your burlap to the size of runner you’ll need/want. Before you start cutting burlap, look at this website for an awesome tutorial on how to cut it. I added drapery weights to the ends of my runners so they draped off the table a little more smoothly (and it worked!). I bought my drapery weights online through Online Fabric Store, which is also where I bought my burlap. Then I seamed my edges with a hot glue gun - this was SO much easier than trying to sew the edges.

Step 2
Create the stripes. The burlap, while beautiful, was still a bit too plain for the table. So I added a stripe along the long edges, which were painted on. I can’t even imagine how much time and headache it would have been to sew these stripes on. Like painting walls, prep your runners with painter’s tape. Lay out newspaper under the burlap so no paint seeps onto your floor.
Step 3
Using a sponge brush, dab the paint on the burlap. If you dab enough paint on the first coat, a second coat is not needed.
Step 4
Because my tables were laid out in long rectangles, the runners needed to be really long. Luckily, I had a a long hallway where I could work.
Step 5
Remove the tape. Look how beautiful the stripes look!

Step 6
Stencil the names. I could not find a letter stencil in the store that was in the right size or font I needed to create my vintage table runners. So what did I do? I made my own stencil, of course! I bought these Drömmar cake stencils from Ikea (these now look different from the ones I bought), which were bendable, yet sturdy enough to trace and cut into stencils. I could have made the stencils from paper, but I didn’t trust they would hold up from the paint.
Step 7
Using a sponge brush, stencil the names onto the runners with paint. When you’re finished, roll up each runner and attach a paper with the name of the runner to the outside with a pin. This will keep your runners organized and wrinkle-free.
Total time: Each runner took about 2-3 hours to make. This does not include the time I took to make the stencils. They probably took about one hour to make.
Total cost: The burlap (30 yards) and drapery weights (13 yards) were a total of $60, including shipping. This created 10 - 12′ long runners, including one for the buffet table. The purple paint came from the Dollar Store and the charcoal paint was a free sample pot from Benjamin Moore. The stencils were from Ikea that cost about $2. I had leftover burlap for other wedding projects such as the “Just Married” bunting and seating chart.
If you missed any part of the Project Wedding series, you can view them here:
How It All Began
The Ceremony
Pom Poms and Fans
Tin Punched Candle Holders
No Sew “Just Married” Bunting
The Dress
DIY Hair Fascinator
The Reception
Creating The Invitations
DIY Ticket Booth
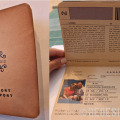
Passport Guest Book
Stenciled Burlap Table Runners
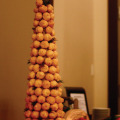
Our Wedding Cake Alternative
Traveling Trunk Prop
DIY Photo Booth Props
Out of Town Gift Boxes
Organize Your Wedding Mementos
Tips For Planning Your Engagement Photo Shoots

NO COMMENTS