Oh, the lovely invitations! I’ve heard so much about how much wedding invitations cost. Long, long ago (in my college days), I worked at Hallmark and remembered when customers ordered their wedding invitations through us. Sometimes we’d thread those colorful ribbons through the invites - a service we provided to help the brides out. Looking back, I remember thinking how dull those invitations looked. The ribbons did nothing to enhance them.
When the first of my girlfriends got married (over a decade ago), I attended a wedding show with her and was introduced to savvier, more creative invitations. Those caught my attention immediately. So did the price tag of $10 per invite. Ouch.
But what could I get for about $1-2 per invitation? I basically had the following options:
• Boxed invitations from Michaels or similar stores, online or retail.
• Hiring a graphic designer.
• Making my own invitations.
In pricing things out, Michaels was probably the cheapest way to go. But *yawn.* I could have forced myself to not care about how the invites looked, but I’m such a creative/designer type that I couldn’t overlook it. I could just see my future self looking back on those invitations thinking, “Why?!”
So, now you know that I believe cheap does not always mean fabulous.
Did I know any graphic designers? How much would they charge? How much would printing cost? And the paper? These items were starting to add up.
Then there was me. I’m not a graphic designer, but I do know my way around a design program or two and I can do most basic functions. So I gave it a go. And if it didn’t work out with me, then I would consider paying for a graphic designer.
First the concept. Mr. M and I decided we would give our reception a travel theme because he and I met while we were backpacking through Europe and we both love to travel. Together, we’ve visited eight countries and 26 cities in less than four years. We also wanted to recreate some of the Provencal atmosphere that we experienced for the ceremony. Put the two together and we turned our reception venue into a French vintage train station.
Part One:
Save The Dates
As most of our friends are online, we emailed our Save The Dates that linked to our wedding website to help save on costs and resources.

The image was from my personal archive of travel photos I’d taken while abroad. Coincidentally, this photo of train tracks was taken in Provence; Arles, to be exact.
Total Time: Can’t remember, but two hours seem to be accurate. It took some time for me to rummage through my old files to find the right photo, then find the right shade of purple, then create the final image. I am also somewhat of a perfectionist, so I tend to spend too much time on tweaking.
Total Cost: $0. *smiles*
Part Two: Invitations
Along the lines of the “train ticket” as indicated in the StD, our wedding invitation was just that. Each guest was instructed to bring their tickets with them in order to be granted access. The ticket was perforated with a stub that would be torn off at the arrival to the reception, much like a real train ticket.

The ticket invitations were designed and printed on card stock, purchased from Wal-Mart for the beautiful amount of $5.86! But the white paper didn’t look very vintage-y so I took the next step to antique them. (Yes, we could’ve bought paper that already looked antiqued, but would it have been as thick as this card stock or be as cheap or as easy to find?)
Supply List
Black tea bags
Hot water
Towel
Iron (optional)
Sepia colored ink pad

Step 1
Prepare the tea bath. Using black tea bags, pour hot water over them in a flat pan. Hot water draws out the tea much better than cold, therefore creating a darker stain.
Step 2
Bathe the invitations. I soaked the invitations for around four hours. Through trial and error, I found that using more tea bags resulted in less soaking time. This created a darker, almost caramel stain, which I liked. Shorter soaks resulted in a beige color, which I felt was too pale.

Step 3
Flatten the invitations. After pulling the paper out of the tea bath, lay them out to dry on towels. They take a long time to dry thoroughly, so use the night to cut back hands-on time. When they were dried, my paper wrinkled quite a bit so I used an iron to flatten them out a bit. You can skip this step if you have time. I did notice that they flattened out quite well on their own in storage.
Step 4
Add the antiqued touch. As you can see in Step 3, while the paper achieved a nice tea stained color, it still lacked the vintage, old-timey flair. So, I searched for an ink pad with just the right shade of antique coloring and found “Sepia” at Michaels. I used it to rub the edges. Now it looked old and antiqued!
We skipped the traditional RSVP cards and opted to have our guests reply through our wedding website, which also included other pertinent information: map to get to the venue, where we were registered, hotel information for out-of-town guests, and a few FAQs. If you don’t have a website for your wedding, I highly recommend setting one up. It’s easy and free and it’ll save you so much time in answering repetitive questions.
Part Three:
Envelope Liners
How I created beautiful and personalized envelopes. I really felt this added touch gave the invitations some extra pop.
Supply List
Envelopes
Card stock big enough to cover the envelope with flap opened
Decorative paper
Pencil
Scissors
Bone folder (optional)
Glue stick

Step 1
The color of these envelopes were perfect. However, like the invitations after being tea stained, these envelopes seemed a bit plain. I enhanced these store bought envelopes by adding a decorative liner.
Step 2
Create the template. Trace the envelope, flap open, onto a piece of card stock. Cut out the card stock. Measure the width of the adhesive at the top of the flap. Align template to the envelope and trim off that measurement at the bottom of the template. (As I write this blog, I realize that you might be wondering why I didn’t just trim off the top. That’s because when you slip the liner into the envelope, lining it up with the bottom edge, the envelope creates a nice border around the liner at the flap.)
Step 3
Check your fit. Insert the template into the envelope to make sure it fits nicely and clears the adhesive.
Step 4
Make the liner. Trace the template onto the back of the decorative paper you’ve chosen to be your envelope liner. Cut out the liners.

Step 5
Insert the liners into the envelopes.
Step 6
Fold down the envelope flap with the liner. Use a bone folder, if you have one. Otherwise, the pads of your fingers work just fine.
Step 7
Glue down. Using a glue stick (how fitting that mine was purple colored), apply glue to the top folded flap of the liner. I didn’t think there was a need to glue down the entire liner. It doesn’t slip out and your guests won’t be taking the envelope apart. (I hope)
Step 8
Finished! No more plain and boring!
Well, what do you think of my redesigned envelopes? Not bad for character and charm, I’d say!

The last item we included, but did not write about in this post is a newspaper style insert that detailed our destination wedding details, where we honeymooned, how we met, and the engagement story. This insert wrapped around each batch of train tickets and substituted as the “inside envelope” as each insert was personalized with the guests’ names. We received SO many compliments on these invitations. It meant so much to me that our details were noticed.
Total Time: This was a long project, with the invitations taking the most amount of time. The design process was lengthy, and the tea staining was quite a chore to keep on top of. I estimate putting aside about a total of two weeks (just to be safe) for about 130 invitations. The good news is that the envelopes can be done while waiting for the invitations to stain and dry, so there’s no need for extra time to do the liners.
Total Cost: Envelopes were $26.26; paper for the liners was $50.11; paper and ink pad for the invitations was $18.28; we already had the tea bags and our friend offered his printer for free = $94.65.
If you missed any part of the Project Wedding series, you can view them here:
How It All Began
The Ceremony
Pom Poms and Fans
Tin Punched Candle Holders
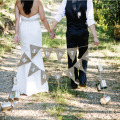
No Sew “Just Married” Bunting
The Dress
DIY Hair Fascinator
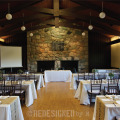
The Reception
Creating The Invitations
DIY Ticket Booth
Passport Guest Book
Stenciled Burlap Table Runners
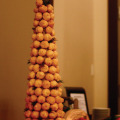
Our Wedding Cake Alternative
Traveling Trunk Prop
DIY Photo Booth Props
Out of Town Gift Boxes
Organize Your Wedding Mementos
Tips For Planning Your Engagement Photo Shoots

These are amazing! I’m getting married in a year and luckily we have a graphic designer friend who has offered her services for the invitations, but if that hadn’t have been an option I definitely would have done them myself so I love seeing other people’s DIY invitations. Yours are one of the most creative and well done that I’ve seen! I love the theme you used for the wedding as well, so creative and meaningful
That’s so wonderful to have a friend like that! Thank you for the compliments! I’m quite proud at how well they turned out. If you like the theme of the invitations, I’d be happy to sell you the file and your friend could customize it and print it for you. Email me at redesignedbym (a) gmail (dot) com for more details. ~M.
I am so impressed!! You could not have done a better job if you were a graphic designer, congratulations on your clever invitations and your marriage!
Awww! What a huge compliment! Thank you so much! I’m currently donning the “wannabe graphic designer” hat again as I’m working on making over this blog. Hope you’ll follow along for the big reveal! ~M.
LOve it! I have been married for 20 years now and the only way I can think of doing something similar is either go back into a Time-machine or wait for my silver jubilee!
20 years! WOW! I think it’s time for a vow renewal, in which case that’s a perfectly good reason to have another party with all these design details.