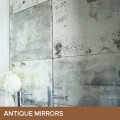
How I wish I could score on some real salvage tin tiles! But since I could not, I devised a way to make the look using embossed wallpaper. You may recognize the title image from my Photography Styling Challenge: Wall Vignette. It was my intent to make the wall look like salvage tin ceiling tiles. Here was the inspiration image:
Source
Here’s the tutorial for how I achieved the architectural salvage tile effect:
Supply List
• Paintable embossed wallpaper
• Base paint color
• Black paint
• White paint
• Twine or string
• Disposable bowl for paint
• Painting sponge
Step-by-Step
If you’ve never worked with paintable embossed wallpaper before, or even heard of it, don’t be nervous! They’re great and easy to work with! To get the tile look, find a pattern with a grid like the one shown here. I also used this same pattern once in an apartment rental where the kitchen didn’t have a backsplash. I hung up this paper and gave it a Tuscan ceramic tile faux finish. It actually looked pretty good!
Step 1
Paint the entire wallpaper in the base color (I chose a seafoam greenish color). You may need to do two coats if the first coat comes out kind of light. You can paint the base color black if you want to imitate the inspiration photo.
Step 2
As I chose to faux finish my tiles in color, the next step is to take a piece of twine/string and dip it in black paint. Lay this string across the paper to indicate the “edges” of the tiles. The string won’t stick to the paper very well, so use your fingers to press the string down. Don’t worry if it doesn’t make a clean line. You actually don’t want to make a perfectly clean line! Make your line straight, but not clean. Understand the difference? Awesome!
Step 3
Using a sponge (I just used a regular kitchen sponge), dab black paint all over the paper. Feel free to add as much black paint as you want. Big black splotches are highly encouraged! Go off the paper, have a ball! Don’t forget to dab over the actual edges of the paper.
Step 4
After the black paint has dried, dab a final layer of white paint to the paper. This white paint adds an aged look to the finish, like the tiles have been painted over and over through the years. Again, you can add as much white paint as you want. I recommend trying to keep clear of the black lines you made because the “edges” of the tiles should be very black.
When you finish, you get something like this! The fun part of this project is that it doesn’t have to be perfect. The more you go wild with the paint dabbing, the more personality your tiles will have. I only wish I had the time to source a paper that had a large single grid pattern like the inspiration photo. This one that I got has a series of small grids, which makes for a great faux tile backsplash, but not as amazing for salvage tiles. I still think it turned out alright. What do you think?
Total time: I spent a total of three evenings painting this wall paper. The first coat of paint on the first evening, the second coat on the second evening, and the faux finishing of black and white paints on the third evening. I’d probably estimate those three evenings were an equivalent of 6 hours. I painted about 8′ of this paper.
Total cost: One roll of this paper will cost about $25, after taxes. I still have paper leftover that I can paint in different colors. The paper and paints came from The Home Depot.
I’ve linked up this project at these parties here.

Love this!
Oh my! You really work hard for each photo shoot, don’t you?!!
Actually, this wallpaper was originally meant as the table runner for the dinner party we had. I just thought I’d kill two birds and shoot the table setting while I was at it. But when that photo shoot tanked, I decided to reuse the wallpaper for the Wall Vignette challenge, so I really didn’t do any extra work for September. However, I really do take styling very seriously and really, really, really want to improve my blog photos, so I’m not opposed to going the extra mile to stage my challenges the best they can be! ~M.
this photo is gorgeous!!
Thank you so much! ~M.
What a great project! And wonderful instructions - I thought this would be beyond me, but now I’m keen to give it a go!
Awesome! I’m happy to hear you find my instructions easy to follow, therefore, less intimidating.
So lovely! Architectural tiles are a fave, but you can’t always find them here. I love your solution of using embossed paper…it creates the same look and gives you so much more flexibility. Great job!!
I adore tin tiles and wish I could find them easily. Then again, when I do, I can’t find the heart to shell out $20-$50 for one tile! This was my way of getting the look without paying the price. Glad you liked it! ~M.
I nominated you for the Versatile Blogger Award because you redo things beautifully, uniquely and usually for not that much money.
Gorgeous! I was wondering how you got that great background for your photo. Thanks!
Glad you liked it, Aimee! ~M.
Your final result came out beautifully. Such a great idea and cost-effective too. I’ll have to remember this one!
Thank you! I was nervous throughout the process that it wouldn’t give the look I wanted it to, but I think it turned out alright!
Hi! I nominated you for a blog award. http://charlieandjo.wordpress.com/2013/09/12/one-lovely-blog-moi/
Jo @ Let’s Face the Music
Great way of repurposing the tile and love that it doesn’t cost a lot.
Thank you!
I’ve always luved the embossed wallpaper but never thought of making it into tiles…great creation!
That’s the beauty of paint! You can’t do whatever you want with it! ~M.
Lovely! I was teaching some painting and decorating students how to do this last year. I like the imperfect, shabby chic look you’ve created.
Thank you! I’m so glad you like it! ~M.
oh my gosh… Thats a lot of hard work.. wow!! You put in that much of an effort into each photo shoot.. Im totally impressed…
This is being perfect.. wow!
Im your newest follower now..
Patricia @ ColoursDekor
http://coloursdekor.blogspot.com
I just want to get really good at photo styling! Thanks for the follow!
Wonderful setting and photography and the project wow, now I want to try my hands on it, when I first saw the picture I thought it was actual tiles. Very well done. I love your red chair btw
What a compliment! Thank you! It was a very easy and imperfect project. Can’t mess it up! ~M.
What a great idea you have here! So cool to see someone else has discovered the beauty of paintable wallpaper; I’ve not tried the patterned ones like yours, but may give them a go thanks to your post!
There are so many great patterns out there in paintable wallpapers, yet I have only worked on this one pattern - twice. Haha. Thanks for the comment! ~M.
Awesome. This idea is a keeper. Thanks for sharing. I found you via Twigg Studios. Have a good week.
Hi hi! Thanks for stopping by! I’m so glad you liked it! ~M.
This looks SO amazing!
Thank you so much!
This is great! Thanks so much for sharing
Glad you liked it!