
I bought a couple of burlap baskets a while ago just because I liked the way they looked. It was only recently that I decided to use them as laundry baskets as our old hamper was not very mobile friendly. The new laundry baskets got some custom labels to keep it all sorted. Here’s how I did it:
Supply List
• Scratch paper
• Letter stencils
• Ruler
• Marker
• Painter’s tape
• Black paint
• White paint
• Foam brush
Step-by-Step

Step 1
[Not pictured] Trace your “darks” and “lights” onto scratch paper with your stencils. Then cut around the words and temporarily fix them to your baskets, either eyeballing their locations on center or using a ruler if you don’t trust your eyeballs.
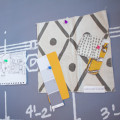
Step 2
Determine how much border you want around the words, mark those borders with a marker and then tape around them to create a rectangular background.
Step 3
With a foam brush, dab the black paint within the taped off area. Let dry.
Step 4
After the background is dry, position your letter stencils onto the basket, using the paper template from Step 1 as a guide to help you space your letters. Dab white paint directly on the black field to paint your letters. I know you’re itching to remove the tape before the white paint dries and I’m here to tell you: GO FOR IT!

These are so much more stylish than the plastic laundry baskets of yore (definition: a time in my early 20’s when I didn’t have as much creative vision as I have now). I can also see these baskets labeled with other things. How about one for each member in the family? Or labeled for its content? What would you label your personalized baskets?
I’ve linked up this project at these parties here.

Hello M! I love this so much! I wonder if you’d do me the honour of sharing it at my new Five Star Frugal linkup? I’d be thrilled if you’d join us as we share ways to live elegantly for less…Mimi xxx
http://atrayofbliss.blogspot.com.au/2015/01/the-five-star-frugal-linkup-is-on.html
Thank you, Mimi! I’ve just posted this on your linkup. Have a great weekend! ~M.
First of all, I am a sucker for burlap! The stenciling is just the icing on the cake to make it sooo fabulous! This is right up my alley. Please, please come link this up at my brand new link party.
http://therobinsnestdesigns.com/feather-your-nest-friday-link-up/
Lory XO
Hi Lory! Thank you for informing me about your link party! I’ve just linked up. ~M.
Thanks for linking up! Come back again . . .live every Friday at 9 am MST. You can link up more than one post each week.
-Lory
http://www.therobinsnestdesigns.com
.
I love this idea! Where did you get the baskets from?
Thank you! The baskets came from HomeSense in Canada.