

How To Make A No Sew Bunting
/
For my wedding, I made a "Just Married" no sew bunting for our get-away photo. I have made this no sew bunting again for a reunion my friends and I had last summer (although, it was made with paper this time) and I plan to make another for my son's play area.
This project took very little time. It also cost nothing to make as I used scraps of fabric leftover from my other DIY wedding projects. It was such an easy DIY that I had to share with you how I made it! (Scroll to the end of this post for the tutorial.)
Just to make it EVEN easier for you, I've shared with you my own personal template I use. No messy and confusing calculations for you, my friend!

Photography by: inge hooker


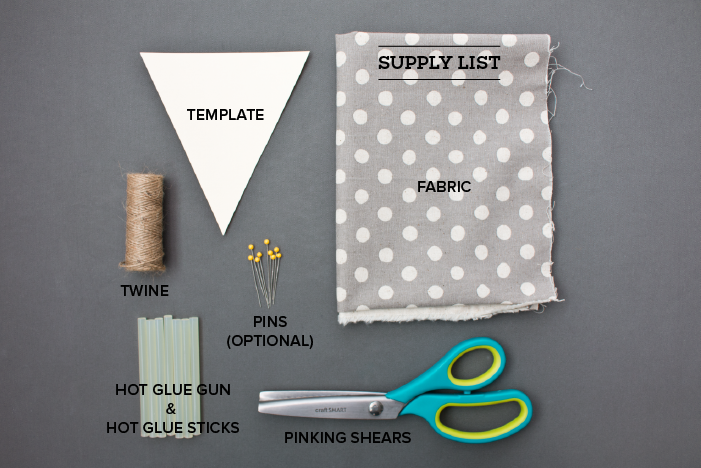
SUPPLIES NEEDED
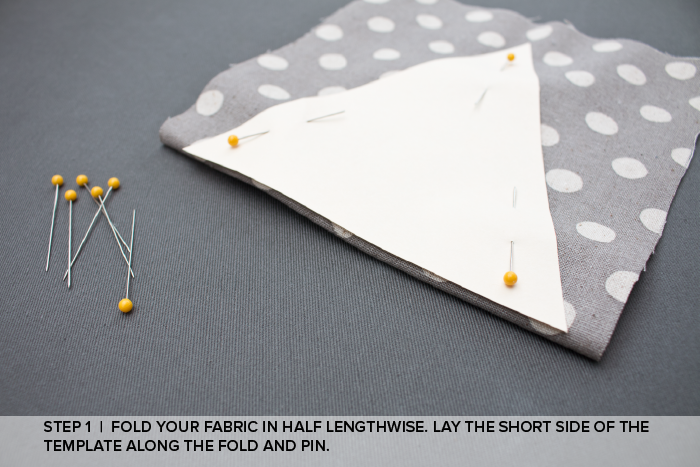
- Bunting template, printed onto cardstock
- Fabric
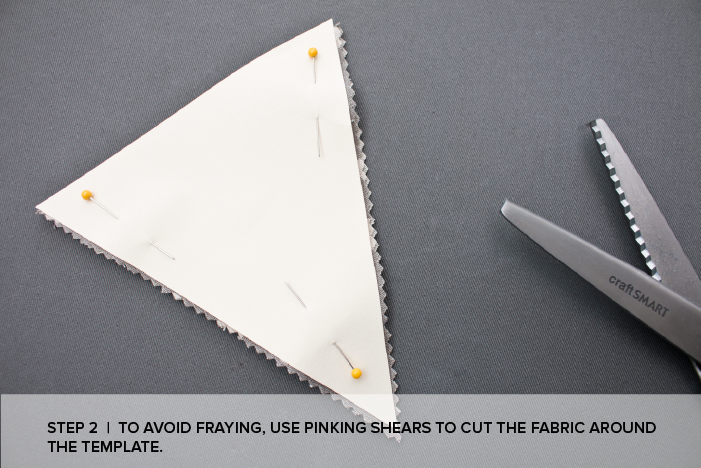
- Pinking shears
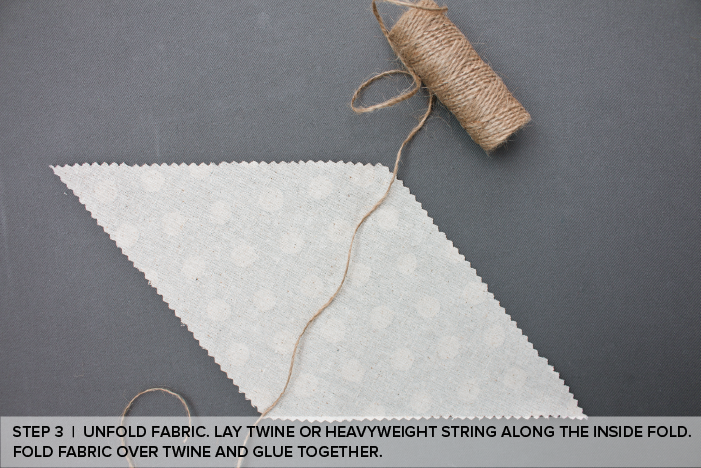
- Twine or heavyweight string
- Hot glue gun and glue sticks or fabric glue
DIY TIPS
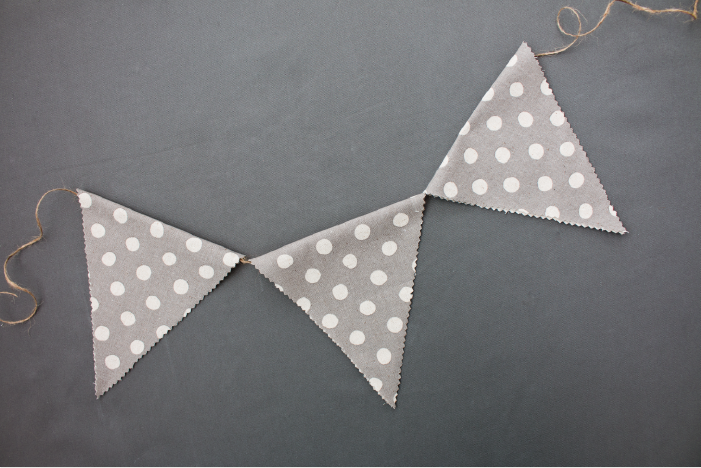
- Don't forget to add at least 6" of twine/string to both sides of the finished bunting so you can hang it or hold it. This is a rare case when more is more as you can always trim the excess of twine/string after the bunting is hung.
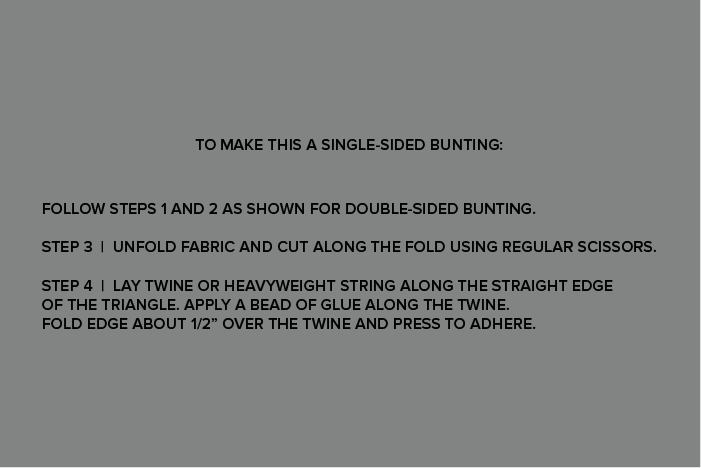
- Choose your glue wisely. Use hot glue on heavyweight fabrics like burlap and felt; fabric glue on lightweight fabrics like linen and quilting fabric.
- I do not recommend using sheer fabric for a no sew bunting.
- If you don't have pinking shears, cutting the fabric with regular scissors will do just fine. The edges will fray resulting in a charming shabby chic look. Alternately, you can fold in the edges and glue that down, but this will take up more time than necessary. Just leave the edges raw!
- Naturally non-fraying fabrics include: Felt, Vinyl, and Leather. Pinking shears will not be required for these fabric types unless you want to have zig-zag edges.
- This no sew bunting can easily be made using paper! You can use craft glue or double-sided tape to adhere the triangles together.