Behind The Scenes | Interior Styling Of A Blue Bedroom
/
Part of my passion for photo styling comes from the smoke and mirrors aspect of making things appear to look perfect for camera. You get a beautiful product in the photograph, but the viewer never sees all the magic that happened behind the scenes. Today, I'm going to walk you through how I used some interior styling tricks to turn a ho-hum space into a picture-perfect bedroom scene. (Scroll down to see behind the scenes photos!)
THE EXISTING SPACE
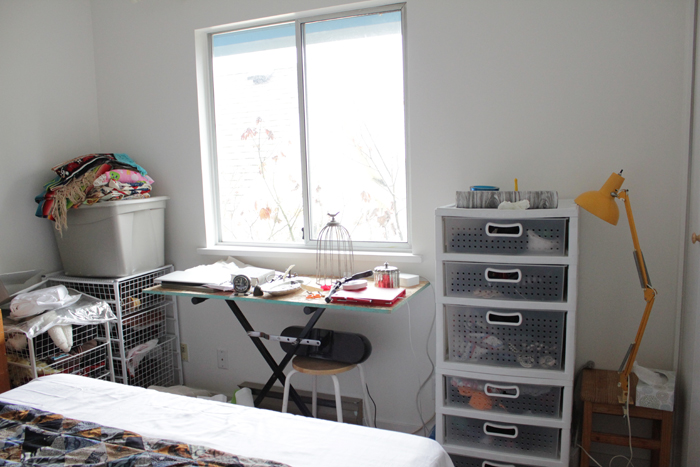
My friend loaned me her bedroom for this styled photo shoot. I would have loved to use my own except my bedroom has the worst natural light ever. My friend's bedroom, however, had an abundance of bright, natural light! She had just moved into her new place, so everything was still rather untouched and raw. And she gave me complete freedom to style it any way I pleased.


THE PROCESS
1 | EVALUATE THE SPACE
The very first thing I do when I enter a space I'm going to work with is to evaluate it. As you can see in the photos above, moving furniture around just wasn't an option. That door was the only point of entry and exit. Luckily, there were a few inches between the bed and the door that I could claim for the left side of the bed so it would appear to give the room more space than it actually did. I knew that given my parameters and time constraints, I would only be able to dress up one corner of this bedroom for this styled shoot. Therefore, I didn't need to make up the bed in its entirety.
2 | FAKE A WELL MADE BED
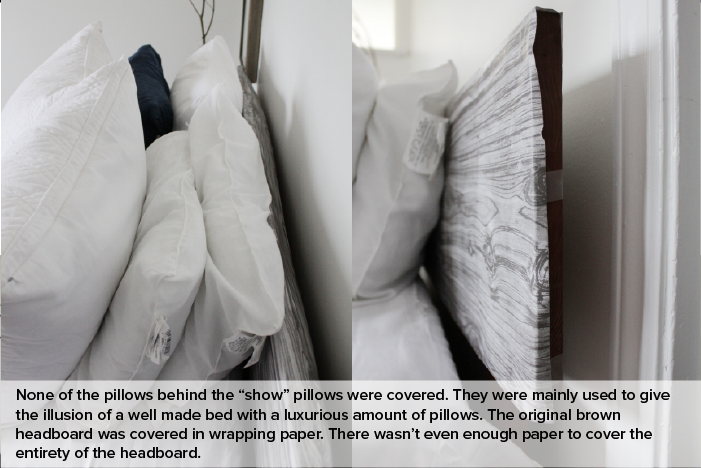
- I couldn't remove the headboard without completely getting rid of the bed frame. Using a roll of giftwrap with a wood grain pattern, I covered up the brown headboard with something a bit more appropriate to my color scheme and concept.
- The head of the bed was made up entirely of uncovered pillows. Only the "show" pillows were properly covered, steamed, and run over with a lint remover. The uncovered pillows behind the show pillows were staged to make the bed appear luxurious. Without them, the bed would have appeared flat without any depth.
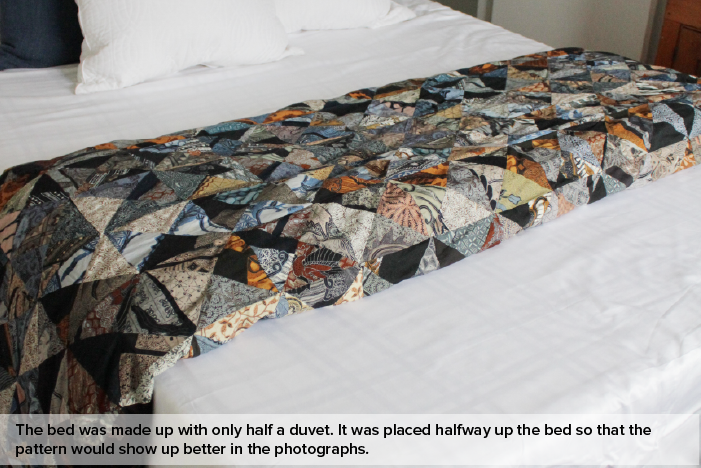
- I made up only half a duvet because my friend's blanket wasn't lofty enough as a single layer. Also, I couldn't place the duvet at the foot of the bed because it wouldn't show up well in the photographs. It was important that the pattern and the colors of the duvet were featured in the final photograph as it was the anchor to the whole styled shoot. Moving it up toward the pillows also helped to mask the plaid patterned sheet that showed through the solid white sheet.
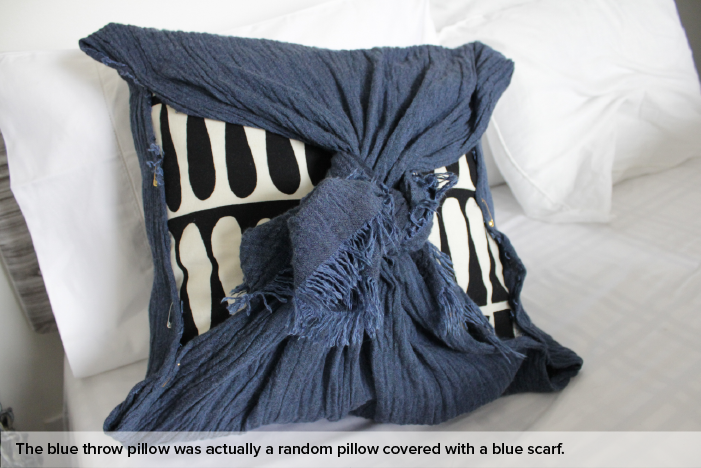
- I didn't have a blue throw pillow in my prop closet, so I improvised by using a blue scarf to wrap another pillow I had.
3 | CREATE SOMETHING OUT OF NOTHING
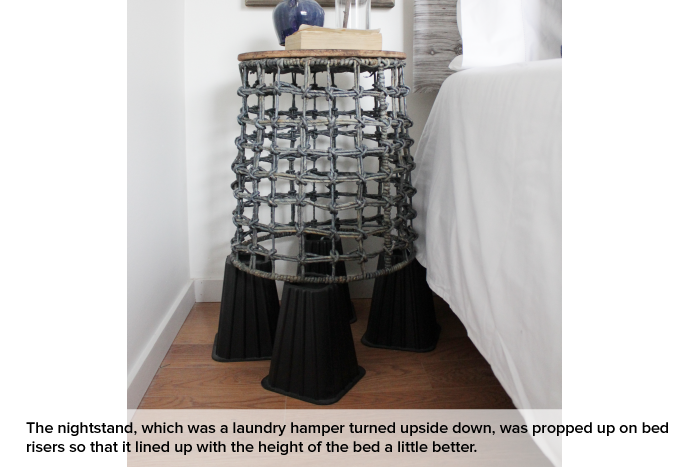
- My friend's nightstand was too small and didn't have enough interest for the story I wanted to tell. I brought in a woven basket, turned it upside down and repurposed it as a nightstand. I think that basket was originally sold as a laundry hamper!
- Placing accessories on the woven texture of my new "nightstand" made things look very wobbly and too "dorm room chic" for my taste. Unfortunately, I had nothing in my prop closet that was round and flat and looked good on camera. That's when my friend came to the rescue by pulling a pizza stone out of her kitchen! How perfectly distressed and stained it was! Seriously, it was so perfect, I can't even begin to describe it.
- The downside to the woven basket was that it was too short in relation to the height of the bed. Even though this was a styled shoot, it's important to stage things to appear as functional as possible so that the styled interior is believable. If this were a real space, the height of the nightstand would need to line up with the height of the bed. I gave the nightstand some height by propping it on bed risers. You can't see them in the final photo as they were cropped out in editing!
- The artwork on the wall was hastily thrown together using a piece of scrap wallpaper and Scotch tape in a shadow frame. Since the wallpaper came off a roll, the paper was still curling which gave the art a more "sculptural" feel.
4 | ACCESSORIZE AND FAFF
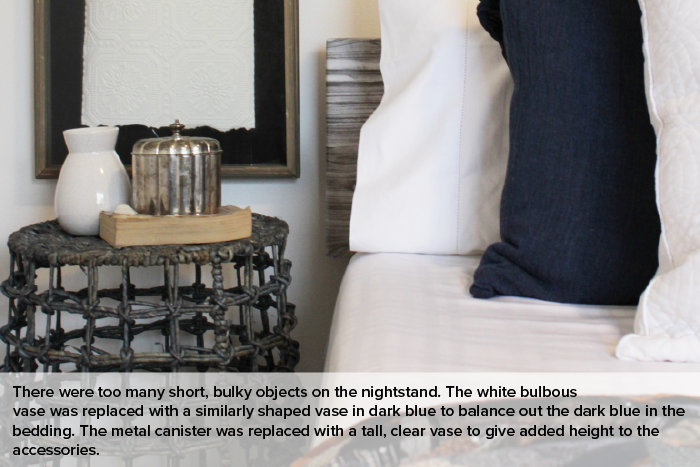
- Initially, there were too many short, bulky objects on the nightstand. By replacing the white bulbous vase with a similarly shaped vase in dark blue, this balanced out the dark blue seen in the bedding, which was heavily visual on the right side of the photograph. The metal canister, while a good color to blend in with the table and the headboard, was replaced with a tall, clear vase to a) maintain the camouflage effect that the metal canister provided, b) to give added height to the accessories.
- I always love adding at least one organic or natural element to any interior space that I style. The branch used for this styled shoot was cut from a tree on my friend's property. I had to go out in the pouring rain to find the perfect branch. Try to imagine this styled bedroom without the branch. Rather boring, huh?
- The spine of the book on the nightstand was a dark brown color that faded into the nightstand surface rendering it almost invisible. What's the point of using an invisible accessory, right? By facing the light-colored pages towards the camera, the book was contrasted against the nightstand surface and didn't visually clutter up the few accessories shown.
5 | TEST SHOTS, TEST SHOTS, TEST SHOTS!
Once I made over the bed and nightstand, I took several test shots to see how the camera saw the space. It always boggles my mind when I see what the camera picks up that the naked eye often overlooks or "fills in" in our minds. Here's what I encountered in my numerous test shots:
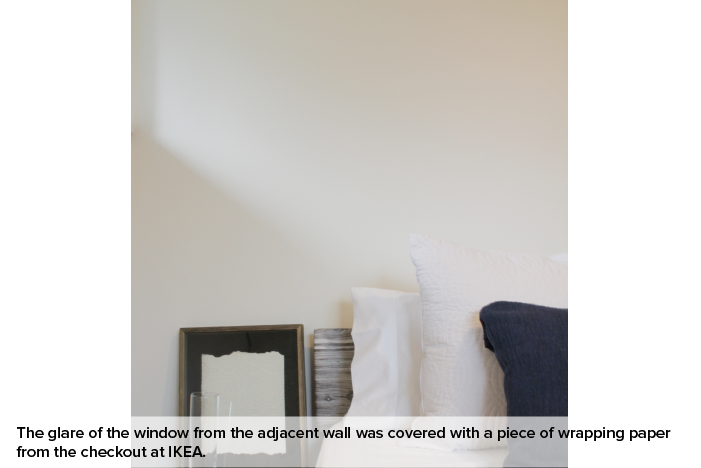
- The glare of the window from the adjacent wall was overly distracting. The solution was a piece of wrapping paper from the checkout at IKEA. It covered the window and diffused that glare perfectly.
- The clear glass vase was moved to the center of the table instead of sitting on the edge of the table to create visual balance amongst all the objects.
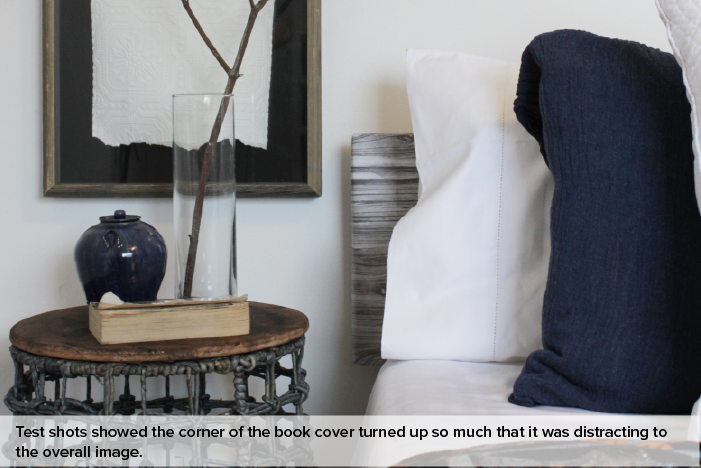
- Earlier test shots showed the corner of the book cover turned up so much that it was distracting (to my friend), so I flattened out the corner, which made for a cleaner photograph. Always use an extra pair of discerning eyes to help you!
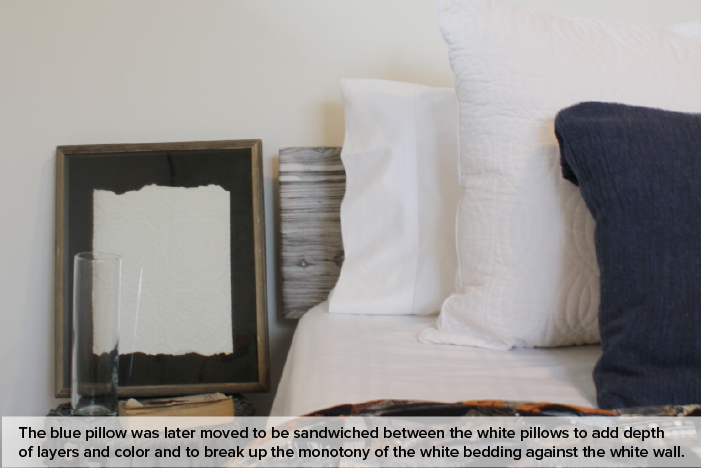
In real life, the blue pillow, which was an accent pillow, should be propped in front of the Euro shams. Test shots made me see that the white pillows easily got lost on the bed against the white wall, so I moved the blue pillow in between the sleeping pillow and the Euro sham to provide more depth of layers to the bedding and colors.
THE FINAL PRODUCT
Then with a little bit of camera placement and cropping, all the staging tricks were hidden from the final photograph!