DIY Upholstered Headboard
/I've been coveting an upholstered headboard for as long as I can remember. The least expensive one I could find for our king-sized bed was through West Elm for $599, plus taxes, plus a $60 shipping surcharge. However, I live in the Great White North and West Elm just does not ship this item to Canada. Darn!
Thanks to all the helpful DIY tutorials out there, I was able to create my own headboard. *smiles*
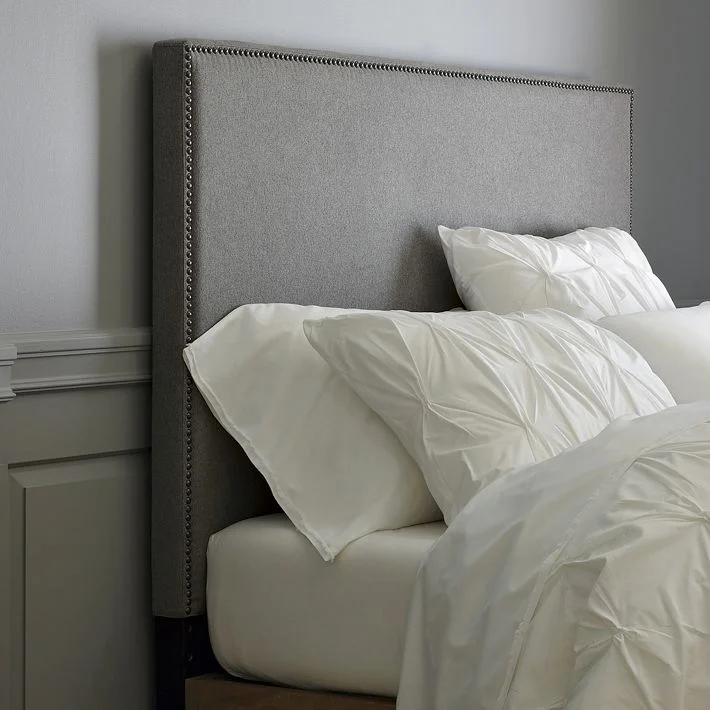
Here's the original inspiration:

The beautiful thing about DIY projects is that you can customize and control the outcome of your designs. The fabric options through West Elm were no good for me, being an anti-microfiber user, and the beige-ness of the velvet was too boring. I also chose a finish for the nailheads that was more suitable for my interior.
These are the supplies I used for a king-sized headboard:
2- Hollow core slab doors
5- 8" mending plates & #10 x 5/8" wood screws
1- Foam mattress topper
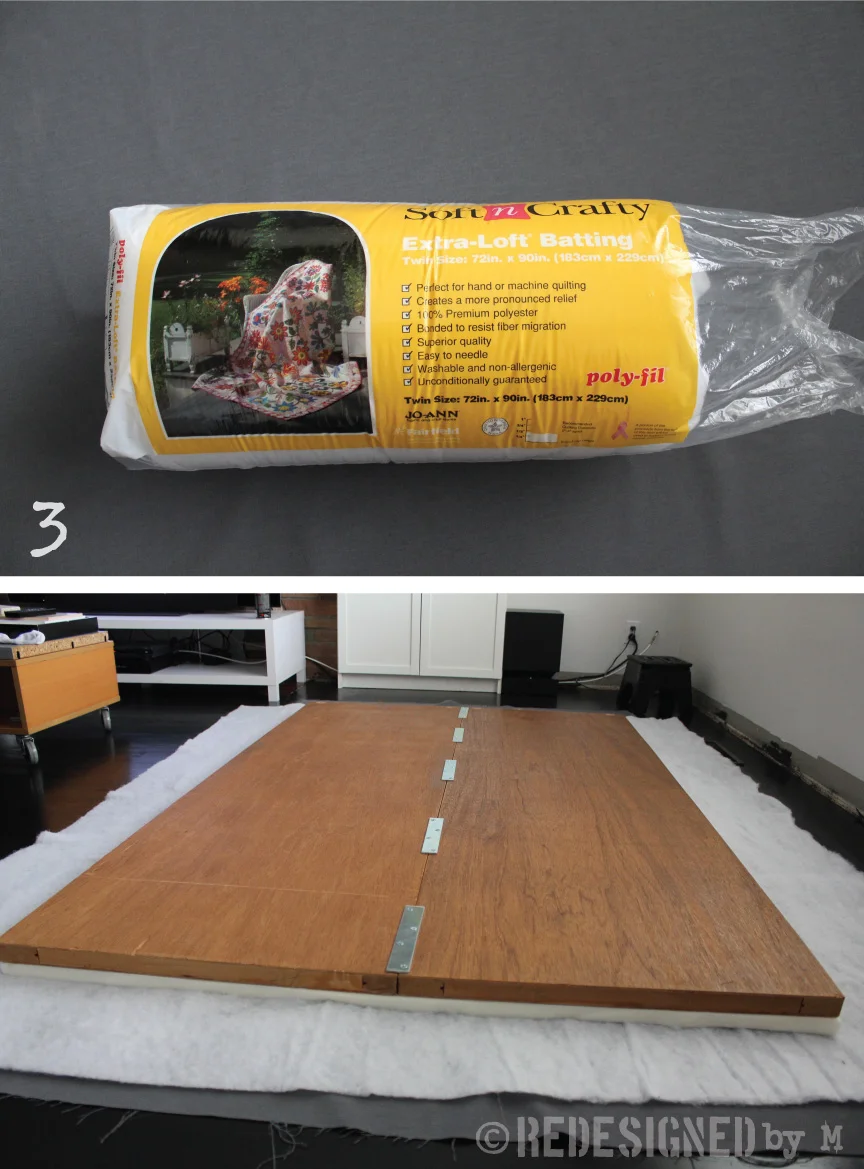
1- Bag of Poly-fill Batting
1- Spray adhesive
3- yards of fabric
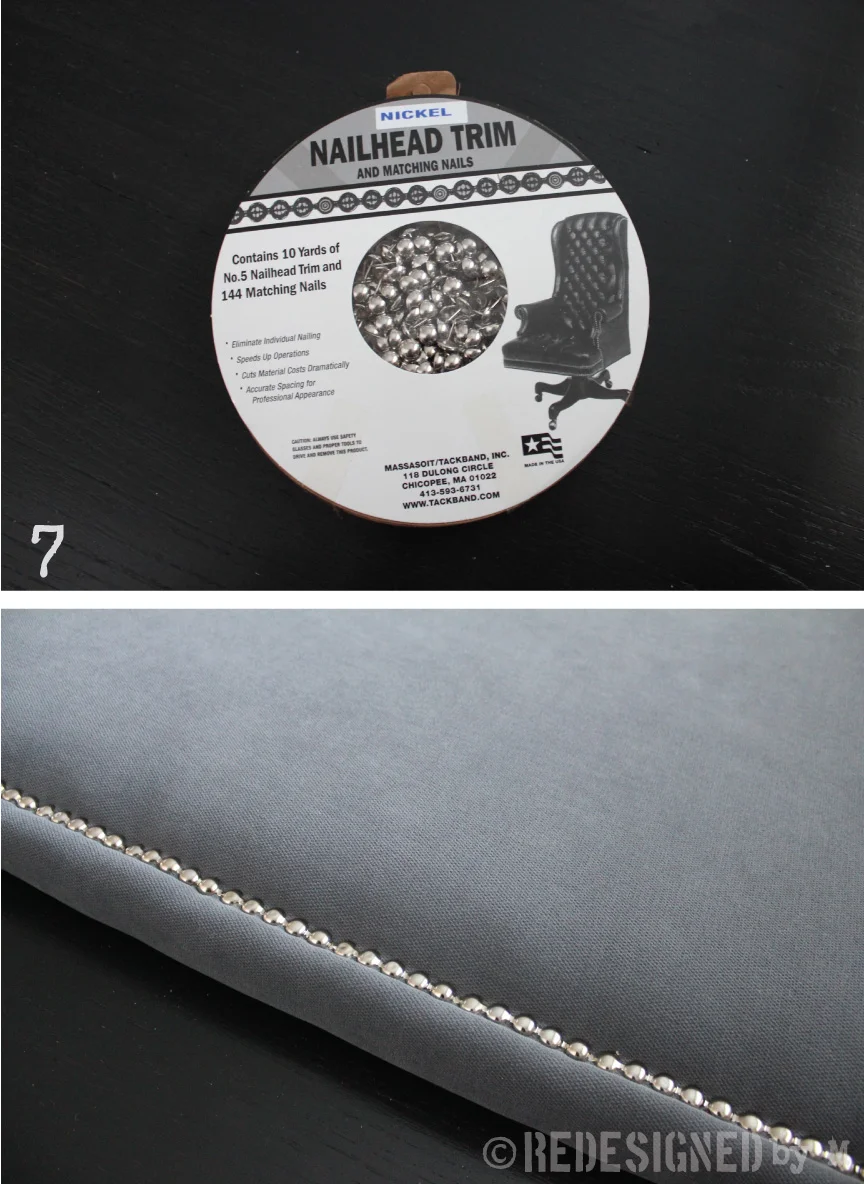
10- yards of nailhead trim
1- Staple gun
1- Power drill
1- Hammer

Step 1: Create a board. I was able to repurpose a pair of sliding doors I wanted to discard from the bedroom closet. These could be repurposed as a table top or recycled as a new door somewhere else, but I saw a new headboard in these doors. Next, I attached the doors together with mending plates, from good ol' Home Depot. Now I have a full sized board that measured out at 48" x 78". This could also be created out of one sheet of plywood if you don't have a pair of discarded doors, which would need to be cut to size (which they can do for you at Home Depot, if you buy your plywood there).

Step 2: Attach the foam. Seeing that foam can be very expensive, I was pleasantly surprised to find a great sale on foam mattress toppers at Wal-Mart for $20. These toppers are generally 1" thick and you need to find ones that are smooth on both sides (not those toppers with the egg crating on one side.) Just make sure there's enough material to cover the entire size of your board as you can always cut and piece the foam to fit. When you take the foam out of the bag, you'll get a lot of lumps and wrinkles, but fret not! With some spray adhesive (I had some left over from my art school days), spray the "front" side of the board and then apply the foam directly onto the board, making sure to stretch the material all the way to the edges and pushing out any bubbles. If needed, cut any excess material and use to piece in other areas where there wasn't enough. Then you'll have this step completed to look like this:

Step 3: Apply the fabric. Lay out the fabric (face down), then lay out the polyester batting on top of that. I bought my batting from Jo-Ann's. A great tip is to sign up for their mailing list so you can get 40% and 50% off coupons. They also have great promotions on the batting alone, so if you can, wait for one of these promotions or coupons to use on the batting. The regular price of a bag of batting for my king-sized headboard is $15. Now that you've laid out the fabric and the batting, lay down the board (front side down). If you're using a patterned fabric, make sure the fabric is centered properly. Then pull the fabric and batting over the edge of the board and staple the material to the back of the board using a staple gun. Make sure the fabric and batting are pulled tightly around the board as you continue to staple around the perimeter. If you're using a pair of hollow-core doors like I did, be sure to staple closely to the edge because that's where the solid part of the doors is.

Step 4: Trim excess fabric. With a pair of sharp scissors, go around and trim off any excess fabric and batting. I left about two inches all around.

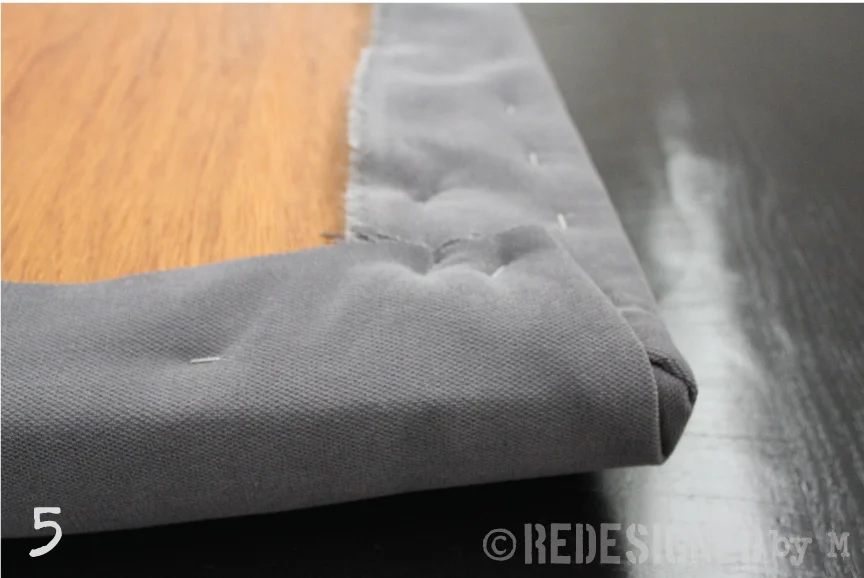
Step 5: Secure the corners. Honestly, I don't think I did a perfect job on the corners, but they were good enough for my needs, so I'm only going to show you my finished corner. My big tip is to do your first corner, and then your second corner would be the one diagonal from your first, making sure to pull at the corners as you staple.

Step 6: Tap in the staples. If there are any staples that didn't go all the way in the board, go around and tap them in with a hammer.

Step 7: Add some bling. At this point, your headboard is pretty much done. But if you want to make it super pretty with some nailheads like I did, then this would be the best step of all. It was so exciting to see my plain headboard all blinged out. I used the nailhead trim on a roll instead of tapping in individual nailheads in order to save time and energy and I think they turned out great. You don't need to apply nailheads to the bottom of the headboard as they won't be seen and you'll be wasting material. Do make sure to know which direction the nap of your fabric runs so you'll know which end is the top. Also, if you're using a patterned fabric, make sure the pattern is faced in the right direction.
Step 8: The finale. If four feet off the floor isn't high enough for you, then you'll need to add some legs. If you used a sheet of plywood, you can use the remaining scraps for legs. I wanted my headboard to be at 66" off my floor (as I have a really tall bed, plus I like the drama of a tall headboard), so I attached 2-two feet legs to the back of my board. Then voila! My beautiful new upholstered headboard with nailheads! What do you think?
Total Time: 1 day
Total Cost: $99.57, including taxes and shipping. The doors were free, the batting was paid with a gift card so that was free too, the legs were made from wood scraps, and the fabric was purchased at 50% off.


