

Ikea Hack: A Bare Bulb Gets A Lamp Shade
/This is one of two light fixtures in my house exposing a bare bulb. It got a shade, fashioned from a shelf riser. Yes, that's right! I saw this Variera Shelf Riser from Ikea and did not think of it as a shelf riser for canned food, but thought to myself, "I think I found my new light shade."

Let's assess the situation at hand. The junction box is mounted to the surface of the wall rather than recessed, which makes my shelf riser of six inches one inch too short to fit around the bare bulb. So I had to figure out a way to build out the shelf riser. I looked all around my house for scrap wood that was only 1/2" wide x 1" thick. This was quite a conundrum as I had none. Enter paint stir sticks.
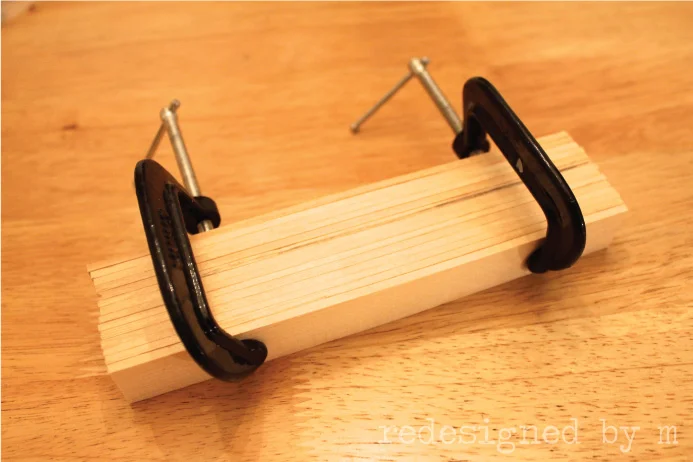
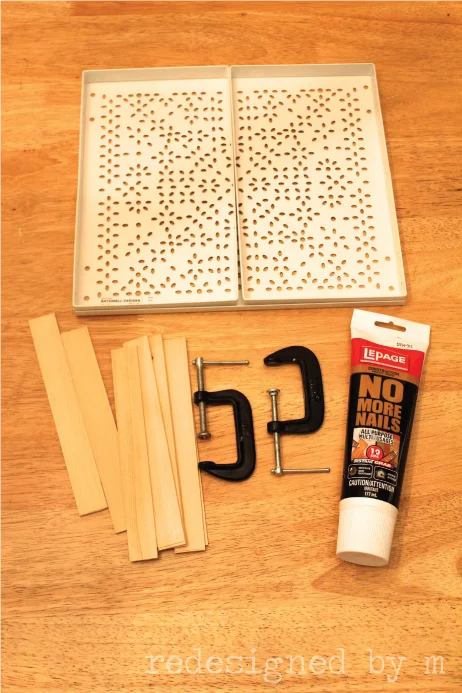
As I had plenty of paint stir sticks laying about, I put them to use and laminated several of them together using construction adhesive. This gave me the extra depth I needed to build out the shelf riser - slash - lamp shade. Here are the supplies I used:
After that part was figured out, I had to create the shade. I thought about just keeping it open all around, but then I'd see the bulb through the risers. Plus, if I could line the risers, I could hide the unattractive paint stir sticks build-up and not worry about having to do a perfect job in that arena.
This lamp shade liner came from another project that I hacked. More on that later.
Here's my supply list for part deux:
One shelf riser "leg" Two shade liners Sharpie Scissors Straight edge Hot glue gun and hot glue sticks
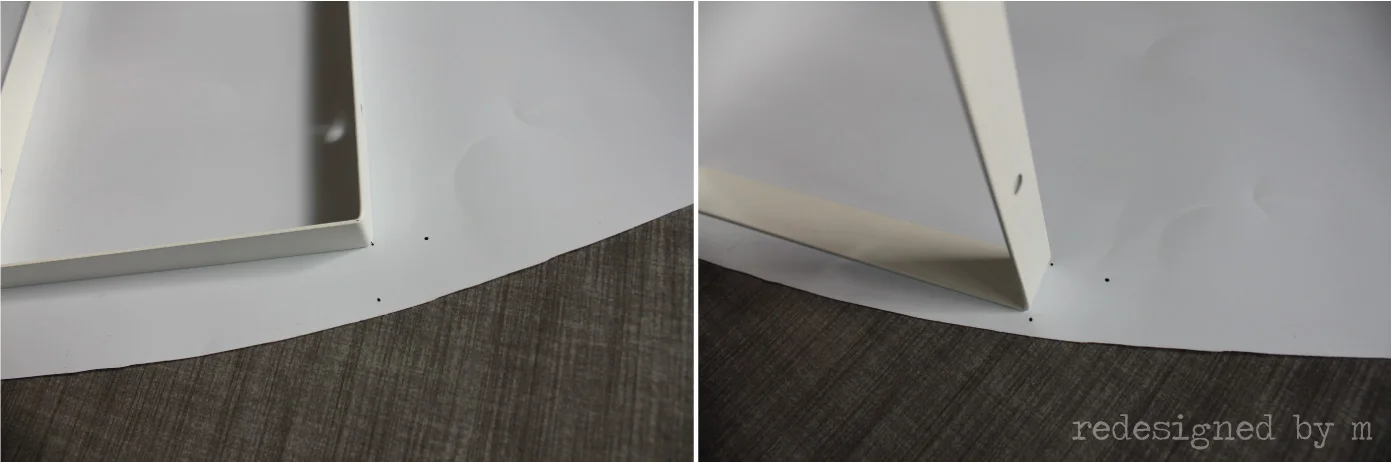
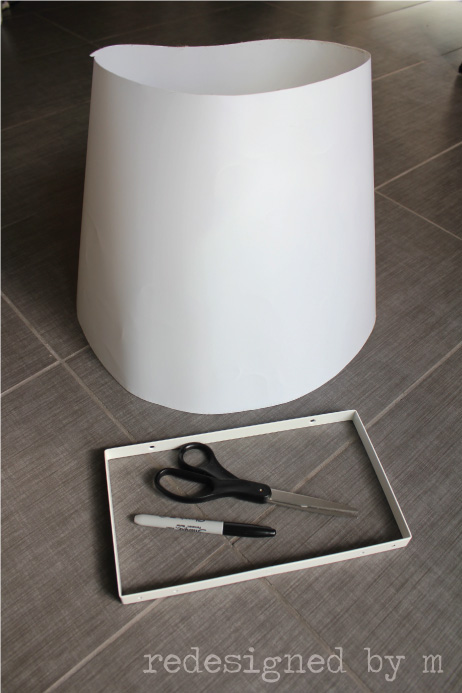
I made a rough template of the shade by laying the riser on an unrolled shade liner. Using the Sharpie, I marked a dot at the four corners of the riser. Then I stood it up and marked two more dots on the ends. Repeat this step for all four sides of the original rectangle.
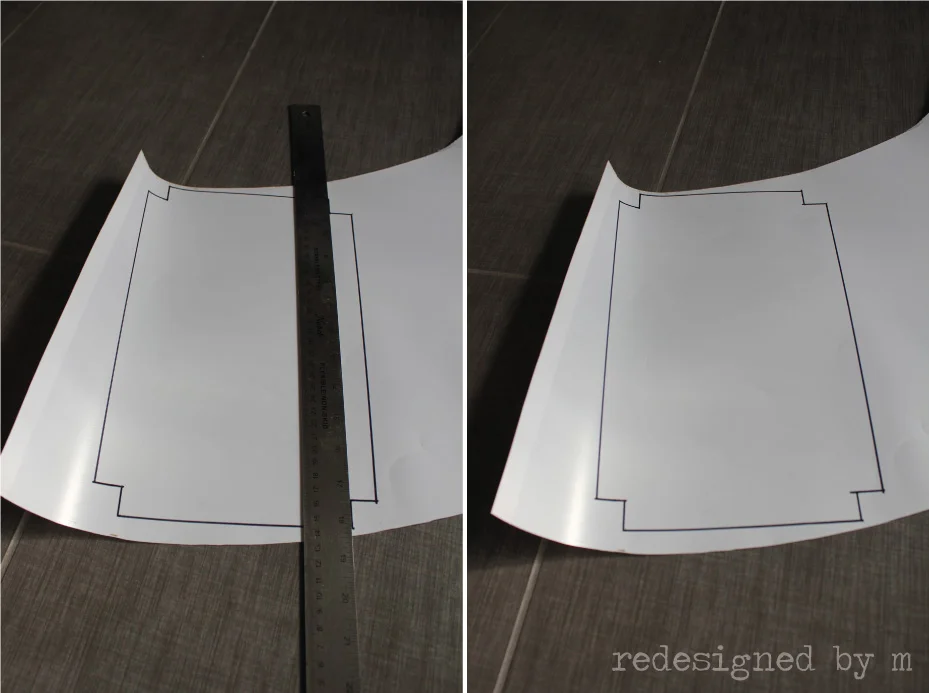
Using a straight edge, I connected the dots to make this shape. It's basically a rectangle with square corners notched out. Then I cut this out and traced it to make a second one (for the other leg). The bottom of the shade was drawn up using the same process. The top of the shade was left open as my light fixture is too high up on the wall for any to see over it. After all the shade linings were cut, I folded the tabs in on all four sides.
Unfortunately, I don't have photos to outline the next steps as this was all done instinctively. There was a bit of trial and error to get it right. When the tabs of the linings were all folded in, I hot glued the tabs to the inside of the metal legs. The legs acted like a frame to hold the shade in place. Then it was all screwed into the wall encircling the bare bulb. Because I left the top of the shade open, I don't have to take down this shade to change the light bulb!

The final product in its light on and light off states.

Here's the detail of the paint stir sticks build out. Everything fit really well!
I apologize for the lack of detail in my photos and descriptions. If you seek to make something similar, feel free to email me or ask your questions in the comments below. I'll do the best I can to explain things!
Total time: It took about fifteen minutes to laminate the stir sticks between Mr. M and I, then I let them dry overnight. Creating the light shade took about an hour and then it was about another hour to test fit everything and install it.
Total cost: I bought the larger Variera shelf riser, so that was $7.99. The stir sticks were free as well as the lamp shade liners. After taxes, this was a total of $8.95.