

Redesigned Rast Dresser (Ikea Hack)
/
When I created the concept for my tool closet makeover, I knew I needed small drawers to hold all the small screws and bits required for a well-outfitted tool closet. The idea of apothecary style drawers immediately came to mind. I would've liked to have found the real deal at a flea market, but since I didn't, I built them myself. To complete the "wall" of apothecary drawers in my tool closet, I made over this Ikea Rast dresser to finish the look.
I specifically chose this dresser of all the dressers that Ikea offers because:
a) It's shallow enough to fit in my shallow closet. b) It's unfinished. c) It's cheap.
It was a fairly simple project to tackle, although it will take some time to accomplish. Here's how I did it:
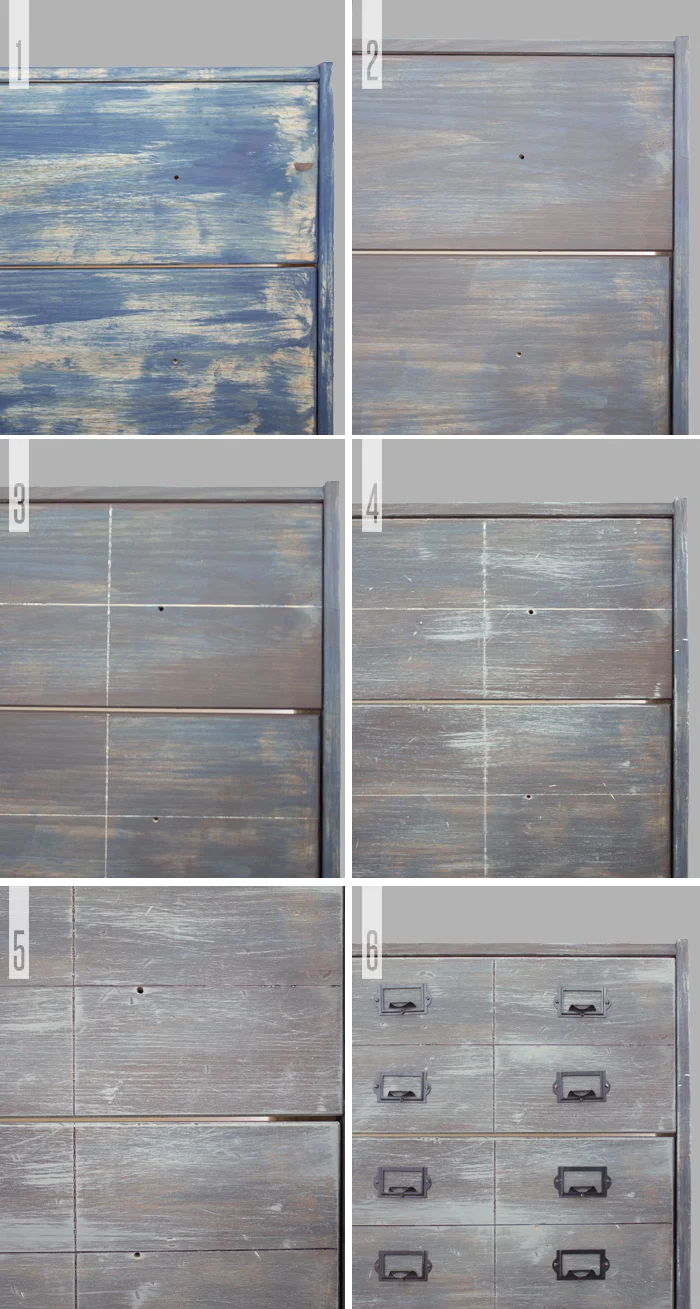
Step 1
After building the dresser, roughly paint over the entire unit with a base color. Do not cover all the wood and use only thin layers of paint. My base color was a deep blue.
- If the holes for the drawer pulls bother you, fill them in with wood putty. Let dry thoroughly and sand before you do any painting.
Step 2
Roughly stain the entire unit on top of the paint. As the first layer of paint was applied thinly, the dry time is minimal. My stain color was a semi-solid gray.
Step 3
Score each drawer into 3 equal columns and 2 equal rows with a screw or nail. These lines will give the look of a bunch of apothecary drawers in one chest.
Step 4
Using both sides of a hammer, lightly distress the unit by banging onto the wood at random, creating divots and scratches to give that aged look. Using a third paint color, preferably light or white color, lightly go over the unit using the dry brush technique. There is a pretty good tutorial about this here. Sand down the surfaces after the first layer and add more where it suits you. Sand down again to blend the colors together.
- DO dry brush over the scored lines (from Step 3).
- DO start off light and add more light layers as you go.
- DON'T bother waiting for the paint to dry before you sand. Trust me, it won't be that wet!
- DO get excited when you see your wood distressing become more pronounced after the first layer of dry brushing.
Step 5
After you've dry brushed and sanded and distressed your dresser to look all old and beat up, trace over the lines you scored into the drawers with a thick black Sharpie pen. I then went back over with a very, very dry brush and quickly brushed over the lines, following the grain of the wood, just so the lines didn't look so perfect.
Step 6
Install drawer pulls with label holders to complete the apothecary look. I bought my pulls from here.
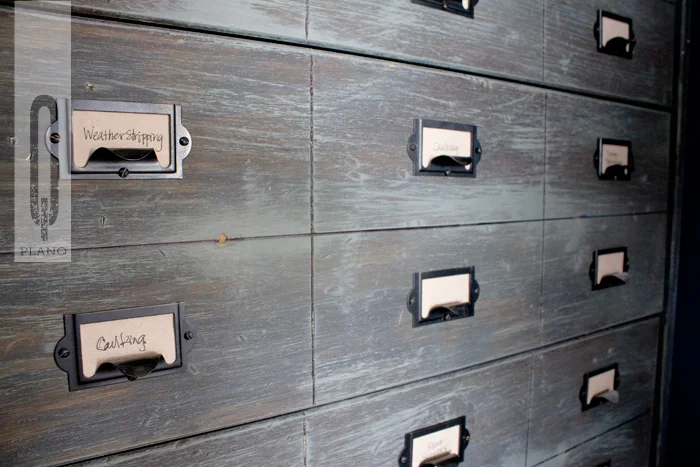
To really finish the look, use old parchment or tea-stained paper for your labels and handwrite everything. Ahhh... very old timey!